반응형

 개인적으로 논문을 읽을때 논문의 전체적인 완성도를 중요하게 생각하는 편이다. 물론 아닌 논문들도 있다는 것을 알지만, 논문을 읽으면서 논문의 전체적인 완성도가 좋지 않으면 논문의 내용도 별로일 것이라는 편견을 가지고 읽게 된다. 반대로 완성도가 좋은 논문들은 좋은 인상을 가지고 읽기 시작하고 대체적으로 내용도 훌륭하다고 인식하게 된다. 따라서 논문의 완성도에 주요한 요인 중 하나로 들어가는 Figure를 잘 그리고 싶다는 생각을 항상하고 있었는데 이번 기회에 한번 정리를 해보려고 한다. 본 글의 중점은 이쁜 Figure 그리기!


이번에 사용한 python 라이브러리는 matplotlib으로 데이터 시각화에 널리 사용되는 라이브러리 중 하나이다. 설치 방법은 다음 두가지 중 하나를 본인의 환경에 맞게 선택해서 설치하면 된다.

conda install matplotlib
pip install matplotlib


matplotlib 라이브러리는 일반적으로 다음과 같이 정의해서 사용한다.

from matplotlib import pyplot as plt


그래프 색상표 Graph color platettes

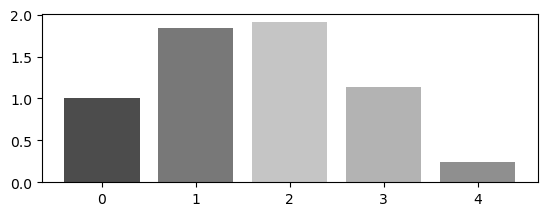
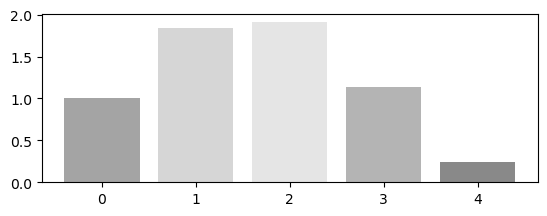
 그래프를 그리다보면 하나의 figure에 여러 개의 그래프를 합쳐서 그려야할 때가 있다. 그런 경우에는 각각의 색상들이 명확하게 구분이 가능해야한다. 심지어 흑백으로 프린트해서 보더라도! (심사하는 사람들이 흑백으로 뽑아서 볼 수도 있으니까) 따라서 어느정도 조화로우면서도 흑백으로 봤을때도 구분이 가능한 색상 팔랫트를 추천하고자 한다.

plt.bar(a1, b1, color=['#1D5B79', '#468B97', '#e9c46a', '#f4a261', '#e76f51'])


color=['#abc4ab', '#a39171', '#dcc9b6', '#727d71', '#6d4c3d']


color=['#16697a', '#489fb5', '#82c0cc', '#ede7e3', '#ffa62b']


color=['#8cb369', '#f4e285', '#f4a259', '#5b8e7d', '#bc4b51']


color=['#d88c9a', '#f2d0a9', '#f1e3d3', '#99c1b9', '#8e7dbe']


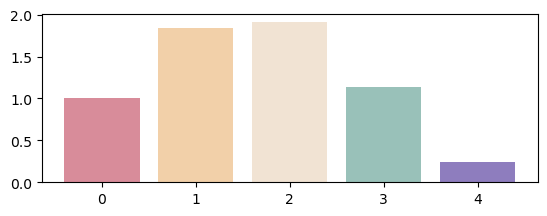
color=['#ed6a5a', '#f4f1bb', '#9bc1bc', '#5ca4a9', '#e6ebe0']


color=['#f79256', '#fbd1a2', '#7dcfb6', '#00b2ca', '#1d4e89']

막대 그래프 패턴 넣기 Add hatch style for bar graph

막대 그래프에 색상을 넣는 것이 부담스럽다면 패턴을 넣는 방식으로 구분하는 것도 가능하다. hatch라는 키워드를 사용해서 검색을 하면 나오는데 색상 없이 그냥 패턴만 넣는 것도 가능하지만 다음과 같이 색상과 패턴을 함께 사용하는 것도 가능하다.

plt.bar(a1, b1, color=color, hatch=['/', '//', '|', '+', 'x'])

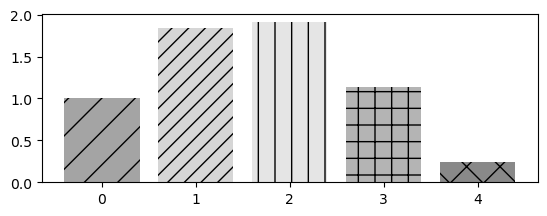
하지만 난 개인적으로 패턴을 넣는 막대 그래프는 하얀색 배경을 사용하는 것이 깔끔해 보인다고 생각한다. (그래프가 작을때 더 이쁜듯)


반응형
반응형

How to convert to python script to exec file with options


PyInstaller는 python script를 python interpreter나 추가적인 module 설치 없이 파일 하나로 동작할 수 있게 실행 파일을 만들어주는 패키지이다.

기본적인 사용 방법은 다음과 같다.

pyinstaller hello.py

이번에는 추가적으로 사용할 수 있는 옵션들 소개와 사용 예시를 소개하려고 한다. 물론 보다 자세한 설명은 공식 사이트에 있다.

이번 포스팅에서 사용할 hello.py 스크립트의 내용은 다음과 같다.

import argparse
import cv2

parser = argparse.ArgumentParser()
parser.add_argument('--name', type=str, default='world')
args = parser.parse_args()

def main():
    img_path = './help.jpeg'
    img = cv2.imread(img_path)
    
    print('hello ' + args.name)
    print(img.shape)

    return
if __name__ == '__main__':
    main()

스크립트와 같은 위치에 있는 help.jpeg라는 이미지와 name이라는 명령어 인자를 읽어와 hello name과 이미지 사이즈를 출력하는 간단한 코드이다. python interpreter로 간단하게 실행을 한다면 다음과 같이 출력이 된다.

(pytorch) hyeonjeong@baghyeonjeongs-MacBook-Pro Study % python hello.py --name=world    
hello world
(225, 225, 3)

이러한 script를 실행파일로 만들 때 다음과 같은 옵션들을 사용할 수 있다.

-F, --onefile

pyinstaller를 사용해서 실행파일을 생성하게 되면 프로그램에 필요한 여러 파일들이 생성된다. 이러한 추가적인 파일 없이 실행파일을 하나의 bundle로 묶어서 만들어 주는 옵션이다. 다음과 같이 두 가지 방법으로 사용할 수 있다.

pyinstaller -F hello.py
pyinstaller --onefile hello.py

이 옵션을 사용하여 실행파일을 생성하면 dist 폴더 안에 hello라는 폴더가 생성되지 않고 바로 hello라는 실행파일이 생성된다.

-y, --noconfirm

이미 pyinstaller로 실행파일을 생성한 후에 script를 수정하고 다시 생성하고 싶을 때 파일의 삭제나 대체하겠다는 입력 없이 바로 대체하여 생성시켜 주는 옵션이다.

pyinstaller -y hello.py
pyinstaller --noconfirm hello.py

--add-data <SRC;DEST or SRC:DEST>

이미지나 텍스트 파일과 같이 script에서 사용되는 추가 파일들을 실행파일에 포함시키는 옵션이다. 다음과 같이 사용할 수 있다.

이때 윈도우의 경우에는 ;를 사용하고 linux나 MacOS와 같은 대부분의 unix 시스템에서는 :를 사용하여 소스파일과 저장될 폴더를 구분하여 사용한다.

pyinstaller -F --add-data="help.jpeg:." hello.py

위의 예제에서는 script와 이미지파일이 같은 폴더 내에 있었기 때문에 이미지 경로를 단순하게./help.jpeg라고 하였지만 실행파일로 만들어지는 순간 run-time으로 임시 폴더에 있는 이미지 파일을 불러와야 하기 때문에 경로를 수정해 주어야 한다.

import argparse
import cv2
import sys
import os

parser = argparse.ArgumentParser()
parser.add_argument('--name', type=str, default='earth')
args = parser.parse_args()

def main():
    img_path = os.path.join(getattr(sys, '_MEIPASS'), 'help.jpeg')
    img = cv2.imread(img_path)
    
    print('hello ' + args.name)
    print(img.shape)

    return
if __name__ == '__main__':
    main()

sys 모듈을 추가로 import 하고 img_path에 sys._MEIPASS 경로에 있는 help.jpeg 이미지 경로로 수정했다.


With Argparse

당연하게도 만들어진 실행파일에 인자를 받아서 사용할 수 있다. 실행파일을 생성할 때는 추가로 해야 할 옵션을 없고 생성된 실행파일을 사용할 때 python interpreter를 사용해서 실행하는 것과 같이 뒤에 추가로 붙여서 사용하면 된다.

./dist/hello --name=earth
hello earth
(225, 225, 3)


Reference

https://pyinstaller.org/en/stable/index.html


PyInstaller Manual — PyInstaller 5.8.0 documentation

PyInstaller bundles a Python application and all its dependencies into a single package. The user can run the packaged app without installing a Python interpreter or any modules. PyInstaller supports Python 3.7 and newer, and correctly bundles many major P

pyinstaller.org

https://docs.python.org/ko/3/library/argparse.html


argparse — Parser for command-line options, arguments and sub-commands

Source code: Lib/argparse.py Tutorial: This page contains the API reference information. For a more gentle introduction to Python command-line parsing, have a look at the argparse tutorial. The arg...

docs.python.org


반응형
반응형

How to convert python script to exec file


기본적인 사용법

최근 파이썬으로 쓰여있는 코드를 다른 사람들이 함부로 볼 수 없게 실행파일로 만들어야 하는 일이 생겼었다.

구글링을 하다가 아주 적당한 패키지를 발견했다. 바로바로 PyInstaller

공식 사이트 설명에 따르면 python interpreter나 module의 설치 없이 실행할 수 있는 파일을 만들어 준다고 한다.

Window, Linux, MacOS에서 모두 사용할 수 있지만 cross-compile은 불가능하다고 한다. 즉, 윈도우에서 만들고 리눅스에서 사용은 안된다는 것.

설치 방법은 아주 간단하다. 본인이 원하는 환경에 따라서 둘 중 하나를 선택하면 된다.

conda install pyinstaller
pip install pyinstaller

기본적인 사용 방법도 아주 간단하다. 

먼저 실행파일로 만들기 원하는 python script를 준비한다. 예시 파일 이름은 hello.py

print('hello world')

그러면 다음과 같이 pyinstaller hello.py 형태로 사용할 수 있다.

(pytorch) hyeonjeong@baghyeonjeongs-MacBook-Pro Study % pyinstaller hello.py
487 INFO: PyInstaller: 5.6.2
487 INFO: Python: 3.9.15 (conda)
509 INFO: Platform: macOS-10.16-x86_64-i386-64bit
510 INFO: wrote /Users/hyeonjeong/Study/hello.spec
515 INFO: UPX is not available.
516 INFO: Extending PYTHONPATH with paths

그럼 다음과 같이 build, dist 폴더와 pythonscript.spec 파일이 생성된다.

(pytorch) hyeonjeong@baghyeonjeongs-MacBook-Pro Study % ls  
build		dist		hello.py	hello.spec

여기서 우리가 원하는 실행 파일은 dist 폴더 안에 pythonscript 이름의 폴더 안에 pythonscript 이름으로 생성되어 있다.

(pytorch) hyeonjeong@baghyeonjeongs-MacBook-Pro Study % ./dist/hello/hello
hello world

PyInstaller Manual

https://pyinstaller.org/en/stable/


PyInstaller Manual — PyInstaller 5.8.0 documentation

PyInstaller bundles a Python application and all its dependencies into a single package. The user can run the packaged app without installing a Python interpreter or any modules. PyInstaller supports Python 3.7 and newer, and correctly bundles many major P

pyinstaller.org


반응형

+ Recent posts